AIでHand Gesture対応のスマートミラー! – 機能とセットアップ –
昔から感じていたのですが, 身だしなみを整える時間がとても退屈です.
髪を乾かしながら, お出かけ前に必要な情報を知りたいし, ひげを剃りながら好きな音楽PVを見たいです.
ということで, 今回は鏡をハックしました. ぜひお試しを!
複数記事に分けて解説しています.
AIでHand Gesture対応のスマートミラー! – 機能とセットアップ –
AIでHand Gesture対応のスマートミラー! – 作成編 –
AIでHand Gesture対応のスマートミラー! – 検証編 –
Hand Gesture対応のスマートミラーとは?
時間や天気, YouTubeの動画を映し, Hand Gestureで操作できる鏡です. マジックミラーという10-30%程度の透過率のある鏡とディスプレイを用いることで, 人の姿を反射しつつ, ディスプレイの内容を表示することができます.
システム定義
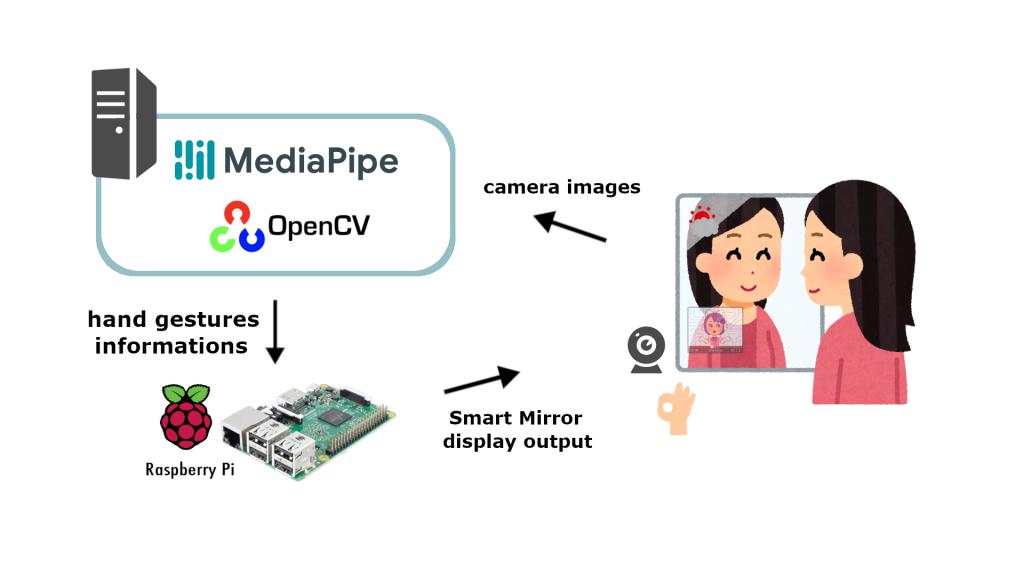
人を映しつつディスプレイの内容を表示する鏡, その付近に設置されるカメラ, カメラが捉えたHand GestureをAIで認識するPC, ディスプレイの表示内容を出力しつつ, PCから指示されたスマートミラーのON / OFF, YouTube動画のPlay / Pauseを実行するRaspberry Piから構成されています.
実装した機能
- Hand Gesture RecognitionでスマートミラーのON / OFF, YoutubeのPlay / Pauseを選択できるようにする
- スマートフォンからYouTubeの好きなPlaylistが選択できるようにする
スマートミラーに表示するもの
- 時刻
- 天気
- Google Calendar
- YouTube動画
準備したもの
ディスプレイ
廃棄予定のTVを用いました. 32型. PCモニターやタブレットでも問題ないです.
https://www.toshiba.co.jp/regza/lineup/b3/index_j.htm
マジックミラー
32型のTVのサイズに合わせて以下でオーダーしました.
https://mirror.kowa-j.co.jp/magicmirror.html
木材
ホームセンターで板状の木材を購入. ディスプレイサイズに合わせてカットしてもらいました.
Raspberry Pi関連
電子工作にはArduinoやM5Stackといったマイコンが必要ですが, 今回のスマートミラーの作成にはRaspberryPiが必要です.

動画のように天気やスケジュールを映すにはソフトウェア"Magic Mirror2“が必要になってくるのですが, これがRaspberryPi向けに作られているからです.
またハンドジェスチャーをキャプチャするために, カメラが必要です. RaspberryPiには純正のカメラがありますが, 高価でケーブルの強度に不安があります. なので今回はUSBカメラ使用しました. 受信する映像で充分ハンドジェスチャー認識でき, 市販品なのでケーブル強度も十分です.


セットアップ
Hand Gesture Recognition用のPC
Deep learningを使用するプログラムはGPUのあるPCで実行し, 結果をRaspberry Piへ送っています.
以下そのPCスペック
OS : Ubuntu 18.04 LTS
GPU : GeForce RTX 2080 Ti
MediaPipe Hands
MediaPipe HandsはGoogleが開発しているHand Gesture Recognitionです. 手をpeaceやokの形にすると, それを認識し, ラベリングします. 以下のソフトウェアはそのPython wrapperです.
# get sources
git clone https://github.com/tech-life-hacking/SmartMirror.git

# test examples in PC
python SmartMirror/example.py
PCにカメラをつないでexampleを実行してみてください. 手を認識できれば, うまくインストールできていると思います.

Raspberry Pi
Raspberry Pi側のセットアップです. 今回はRaspberry Pi4 4GBを使用しました.
Magic Mirror2
スマートミラーのプラットフォームとなるソフトウェアです. 配布されているモジュールを追加することで時間や天気を表示することができます. Third Party製のモジュールも豊富で, YouTube動画の再生やGoogleカレンダーの表示をすることもできます.
# get sources
git clone https://github.com/MichMich/MagicMirror

MagicMirror_scripts
上記のMagic Mirror2の簡易インストールスクリプトです.
# install MagicMirror
bash -c  "$(curl -sL https://raw.githubusercontent.com/sdetweil/MagicMirror_scripts/master/raspberry.sh)"

# test
cd MagicMirror
cp config/config.js.sample config/config.js
npm start
ディスプレイがスマートミラー用の画面になればインストールが正常にできていると思います.

MMM-Remote-Control
Magic Mirror2のモジュールをコマンドで制御するためのモジュールです.
# install MMM-Remote-Control in Raspberry Pi
bash -c "$(curl -s https://raw.githubusercontent.com/Jopyth/MMM-Remote-Control/master/installer.sh)"

# modify config.js
nano MagicMirror/config/config.js

# modify address and ipWhitelist in config
var config = {
        //address: "localhost",
	address: "0.0.0.0",	// default is "localhost"
	port: 8080,		// default
	//ipWhitelist: ["127.0.0.1", "::ffff:127.0.0.1", "::1", "::ffff:172.17.0.1"],
        ipWhitelist: [],
	...
};

# add below
{
    module: 'MMM-Remote-Control',
    // uncomment the following line to show the URL of the remote control on the mirror
    // position: 'bottom_left',
    // you can hide this module afterwards from the remote control itself
    config: {
        customCommand: {},  // Optional, See "Using Custom Commands" below
        showModuleApiMenu: true, // Optional, Enable the Module Controls menu
        // uncomment any of the lines below if you're gonna use it
        // customMenu: "custom_menu.json", // Optional, See "Custom Menu Items" below
        // apiKey: "",         // Optional, See API/README.md for details
    }
},
# Get ready in Raspberry Pi
cd MagicMirror
npm start

# test MMM-Remote-Control in PC terminal
curl -X POST http://YourRaspberryPiIPAdress:8080/api/module/alert/showalert \
  -H 'content-type: application/json' \
  -d '{
    "title": "Hello World!",
    "message": "Alert Successfully Shown!",
    "timer": 2000
    }'
Hello World!と表示されればインストールが正常にできていると思います.

MMM-YouTube
YouTube動画を表示するモジュールです. MMM-Remote-Controlをインストールしておくことで, 再生や停止をさせるコマンドをプログラムからコールすることができます.
cd ~/MagicMirror/modules
git clone https://github.com/tech-life-hacking/MMM-YouTube

# modify config.js
nano MagicMirror/config/config.js

# add below
{
    module: "MMM-YouTube",
    position: "middle_center",
    config: {
            width: "480px",
            height: "420px",
            onStartPlay: {
                type: "playlist",
                id: "YourFavoritePlaylist",
                shuffle: true,
                loop: true,
                autoplay: true,
            }
    }
},
# make test.py and save
nano test.py

# test modules
import requests
headers = {
        'content-type': 'application/json',
}
dataPlayload = '{"type": "playlist", "listType": "playlist", "id": "YourPlaylistID", "shuffle": "true", "loop": "true", "autoplay": "true"}'
requests.post('http://YourIPAdress:8080/api/module/youtube/youtubeload', headers=headers, data=dataPlayload)
YourPlaylistIDとYourIPAdressを編集して実行してみてください. YouTubeのPlaylistの動画が再生され始めたらインストールが正常にできていると思います.

cec-client
TVモニターをディスプレイとして使用する際, POWERのON, OFFをcec-clientによって制御できます. Raspberry PiのディスプレイON / OFF機能でも代替可能です.
# TV
# install a package
sudo apt install cec-utils

# TV on
echo on 0 | cec-client -s

# TV off
echo standby 0 | cec-client -s

# Raspberry Pi
# Screen off
tvservice -o

# Screen on
tvservice -p
Blynk
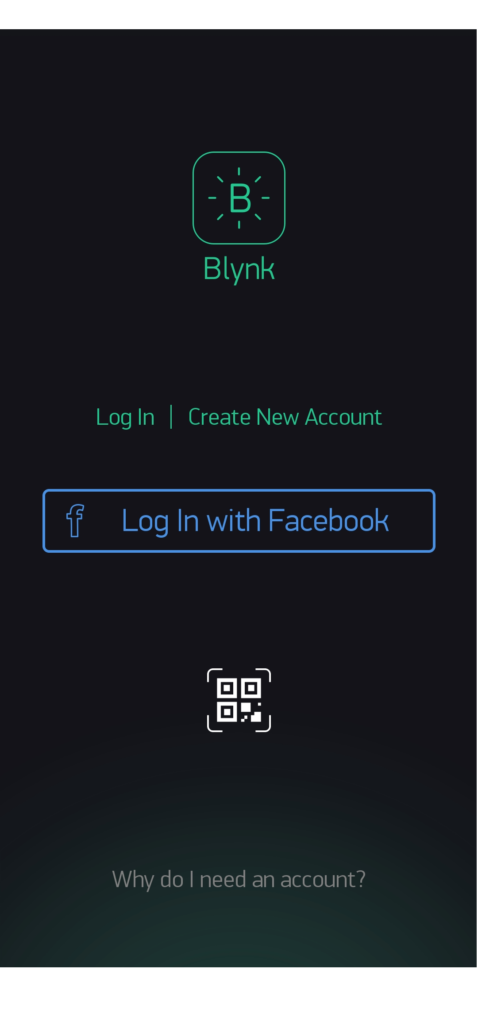
BlynkはスマートフォンアプリからJetson nanoやRaspberrypi等のIoTデバイスへ簡単にアクセスできるようになるライブラリです. 美しいUIのアプリを作成できるのが特徴です.
スマートフォン側の準備
アプリをインストールします.


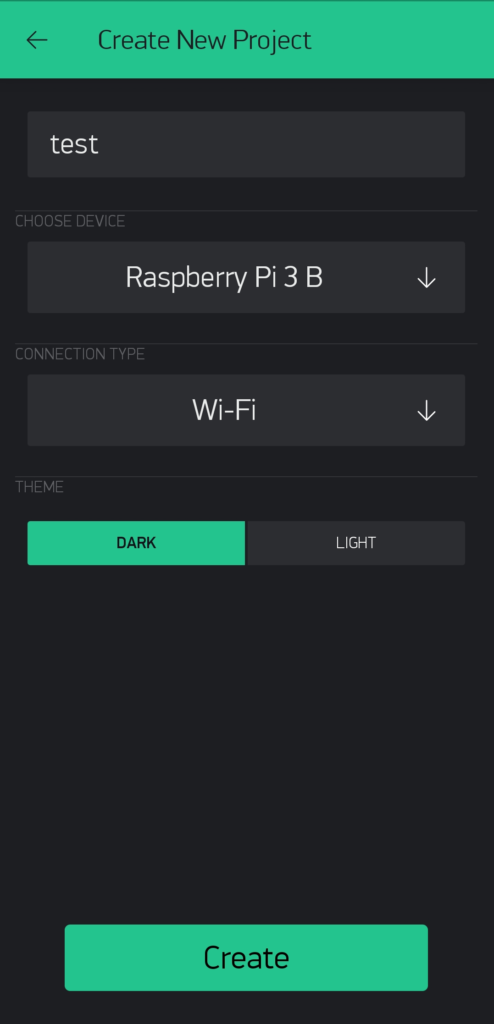
ユーザー登録を行い, New Projectを選択, 以下のように設定する.
Create選択後, AuthToken(ユーザ識別子)が登録したEメールに送られてきます.
Raspberry Pi側の準備
#パッケージをインストール
sudo pip install blynklib

#サンプルをダウンロード
git clone https://github.com/blynkkk/lib-python.git

#AuthTokenを自分のものに変更するために編集
gedit ./lib-python/examples/03_connect_disconnect.py
BLYNK_AUTH = 'YourAuthToken’のYourAuthTokenを自分のEメール宛てに送られてきたものに変更
#サンプルを実行
python3 ./lib-python/examples/03_connect_disconnect.py
このサンプルは繰り返し接続と切断を繰り返すものです. スマートフォンアプリ側で「Connected」と「Disconnected」を繰り返し続けているようになれば, 正常にセットアップされています.

セットアップが完了したら, 次は実際に作成していきましょう.
複数記事に分けて解説しています.
AIでHand Gesture対応のスマートミラー! – 機能とセットアップ – 今ここ
AIでHand Gesture対応のスマートミラー! – 作成編 – 次
AIでHand Gesture対応のスマートミラー! – 検証編 –